A different brief
Residential lighting is mostly about hierarchy: which surface leads, which stays quiet. Workspaces reverse the priorities. Light has to be even across the task, comfortable for eight hours, free of glare in screens and, now that so much work happens on video, flattering to faces on camera. Accent and drama come after those are secured.
That changes how beam angle is used. Wide, well-controlled beams carry the task layer; narrow beams are reserved for feature walls, art and reception. The optic around the source matters as much as the angle.
This guide applies the principles in our beam angle and optics guide to offices, cabins, boardrooms and reception areas. It covers:
- Uniformity on the task plane, and how beam angle and spacing deliver it.
- Glare limits, UGR and the optics that meet them.
- Screens and reflections.
- Lighting faces for video calls.
- Cabins, boardrooms, reception and corridors.
1. The task plane: uniformity first
Desk work needs enough light across the whole working area, without bright and dark patches that make the eye readjust.
- Reference values: EN 12464-1 is widely used as a reference. For writing, typing, reading and data processing in offices it gives a maintained illuminance of 500 lx on the task area, a uniformity (minimum to average) of 0.60 and a UGR limit of 19. Check the edition and any project-specific or local requirement, such as the National Building Code and IS 3646, before specifying.
- Wide beams overlap. On a desk plane about 2.2 m below a 3.0 m ceiling, a 60° beam gives a pool of about 2.5 m; a 36° beam about 1.4 m. Wide beams reach uniformity with fewer fittings and less sensitivity to desk layout.
- Spacing to the pool, not the ceiling grid. Spacing at about the pool diameter at the desk plane joins the 50% boundaries. Wider spacing leaves dips between fittings.
- Narrow beams over desks are a mistake. They create bright patches on the desk, dark gaps between them and high luminance contrast on the work surface.
- Linear sources with wide, controlled cross-sections give very even task light along a run of desks. Suspended profiles over workstations can combine direct and indirect light. See suspended profiles.
2. Glare and UGR
Discomfort glare is the most common complaint in offices, and it is controlled at the optic.
- UGR estimates discomfort glare for an installation from a given viewpoint, considering the luminance of the fittings, their position and the background. It is calculated for the layout, not printed on a single product, although manufacturers publish tables for standard rooms.
- Optics that help: deep-recessed downlights, dark-light reflectors, microprismatic diffusers and louvres all reduce the luminance seen at normal viewing angles.
- Wide beam is not the same as wide glare. A well-designed wide-beam optic with high shielding can meet a UGR limit; a bare wide-angle source will not.
- Direct-indirect light: sending part of the light to the ceiling lowers the contrast between fittings and their background, which reduces perceived glare and makes rooms feel brighter.
- Avoid bare high-power spots in work areas. Their bright apertures are exactly what UGR penalises.
3. Screens and reflections
- Reflections in screens come from any bright source or surface in the reflected path between screen and eye: luminaires, lit walls, windows.
- Keep high-luminance sources out of the reflected zone of the main workstations. Check this on the section, especially for fittings directly behind the user.
- Low-luminance optics reduce the brightness of reflections even when they cannot be moved.
- Lit walls behind the user reflect too. Keep strong accent walls out of the screen’s reflection path, or keep their level moderate.
- Daylight is often the biggest reflection source. Blinds and screen orientation matter as much as the artificial scheme. Curtain automation can link blinds to the lighting.
4. Faces on camera
Video calls added a new task: the face itself has to be lit well enough to read on camera.
- Light from the front, not from above. A single narrow downlight above the chair casts shadows in the eye sockets and under the nose. On camera it reads as tired and hard.
- Vertical illuminance on the face comes from wide or indirect light in front of the user, a lit wall behind the camera, or a desk-level source facing the user.
- Light the background moderately. A dark wall behind the user turns them into a silhouette against a bright screen; an overbright wall makes the camera expose for the wall. A soft, even wash behind the seat works best.
- Avoid hot spots in frame. A narrow accent on the wall behind the chair appears as a bright patch beside the user’s head.
- Colour temperature consistency across the face and the background keeps skin tones natural on camera.
5. Cabins and director’s offices
A cabin combines a workstation with a meeting space and often a brand or feature wall.
- Task light over the desk from wide, well-shielded optics or a suspended linear fitting, not from a single narrow spot.
- A lit feature wall behind the visitor’s chair (not the director’s) adds depth without putting a bright patch behind the director’s head on camera.
- Art and awards with narrow, well-aimed accents at the gentle end of the contrast conventions in the pillar guide.
- A meeting corner with softer, wider light and a dimmable scene for discussions.
- Separate control for task, wall and accent layers. See office lighting.
6. Boardrooms
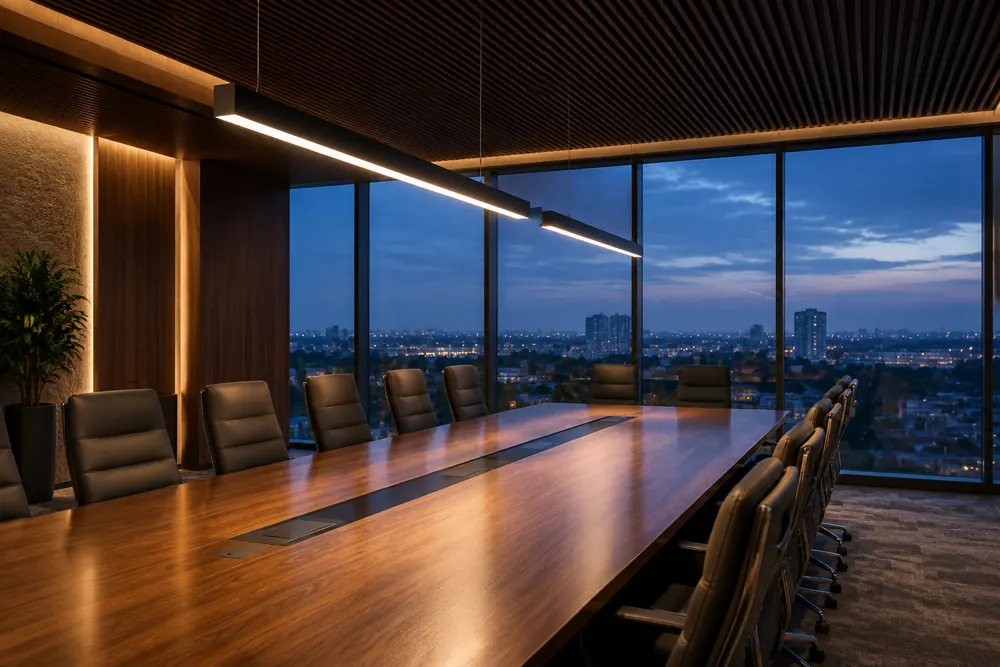
- Light the table evenly along its length. A suspended linear profile following the table gives continuous, uniform light and defines the room.
- Faces across the table need vertical light: indirect components, wall washing on the long walls or a perimeter cove.
- Presentation and video scenes: dim the front wall near the screen, keep faces lit for the camera, and keep light off the screen surface.
- The screen wall should not carry strong accents. The display is the focus during meetings.
- Glare from seated positions: check fitting luminance from every seat along the table, not just from the head of the table.
7. Reception, corridors and breakout spaces
These are where a workspace shows its character, and where narrower beams return.
- Reception: a grazed or washed feature wall behind the desk, often carrying the brand, is the primary focus. The reception desk itself needs soft, flattering light on the receptionist’s face.
- Logos and brand walls: wash evenly for legibility; grazing a relief logo adds depth but needs careful aiming.
- Corridors: elliptical or linear optics run light along the corridor and onto the walls, avoiding a row of bright pools on the floor. Lit walls make corridors feel wider.
- Breakout and pantry spaces: a warmer, more residential scheme with pendants and accents signals a change of pace.
- Waiting areas: keep sources out of the view of seated visitors, as in a living room.
8. Controls and daylight
- Daylight-linked dimming on fittings near windows keeps levels steady and saves energy.
- Presence detection in cabins, meeting rooms and washrooms.
- Scenes in boardrooms and cabins: work, meeting, presentation, video call.
- Consistent dimming quality: flicker at low levels is visible on camera even when the eye cannot see it. Specify flicker-free drivers for any space used for video.
- See smart lighting controls for how scenes and sensors are integrated.
Specification notes
- Design the task layer for uniformity: wide, well-shielded optics spaced to the pool at desk height.
- Check UGR for the layout against the project’s reference standard.
- Keep high-luminance sources and lit walls out of the screens’ reflected path.
- Light faces from the front for video, and wash the background softly.
- Reserve narrow beams for feature walls, art and reception.
- Use linear or elliptical optics in corridors to light walls, not just the floor.
- Specify flicker-free dimming wherever cameras are used.
Frequently asked questions
What beam angle is best for office lighting?
For the task layer, wide beams (typically 60° or more, or wide linear optics) give even coverage across desks at practical spacings. What matters as much is shielding: the optic has to keep luminance low at normal viewing angles to control glare. Narrow beams are best kept for feature walls, art and reception.
What UGR should an office have?
EN 12464-1, widely used as a reference, gives a UGR limit of 19 for writing, typing, reading and data processing in offices. Check the current edition and any local or project-specific requirement before specifying.
How do I light an office for video calls?
Light the face from the front with wide or indirect light, avoid a narrow downlight directly above the chair, and wash the wall behind the user softly so they do not read as a silhouette. Use flicker-free dimming so the camera does not pick up banding.
Are spotlights suitable for offices?
Narrow spotlights suit accents, feature walls, art and reception areas. Over desks they create bright patches and glare, so the task layer should use wide, well-shielded downlights or linear fittings.
Continue the series
- Beam Angle in Lighting Design: Optics, Lenses and the Architecture of Light
- Beam Angle in Bedroom Lighting: Designing for the Reclined Eye
- Beam Angle in Living Spaces: Volume, Art and Vertical Surfaces
Planning an office, cabin or boardroom in Bhubaneswar, Cuttack or elsewhere in Odisha? Book a free consultation and we will plan the task, glare and video lighting with your design team.
About the author
Prem Rout, Founder of JMAP Solutions, set up in 2022 to deliver lighting, automation and building management solutions from Bhubaneswar. Over 15 years of experience in building products, construction and project business development across Mumbai and Odisha, working where design intent meets specification and site delivery. Connect on LinkedIn.